AI-Augmented OpenPages Experience
Implementation Overview
The objective of this solution is to demonstrate AI for GRC solution that has the ability to streamline the GRC process and improve the overall efficiency of GRC workflow. To build an effective and efficient GRC system and achieve the desired outcomes for success, this solution will leverage watsonx.ai to deliver these core capabilities:
- Automating Child Data Object Creation from Parent Data Object Entries
- Realtime Similarity Identification for Data Objects
- Executive Summary Creation
- Categorization and Classification
Integrate watsonx.ai Model into OpenPages
Prerequisites
- IBM Cloud Account
- IBM OpenPages instance
- IBM watsonx.ai instance with deployed asset
Integrate the watsonx.ai Model into OpenPages
- In the OpenPages platform, navigate to the Administration menu, then go to Integrations, then Custom Machine Learning Models.
- Click on New Model and you should see the following view:
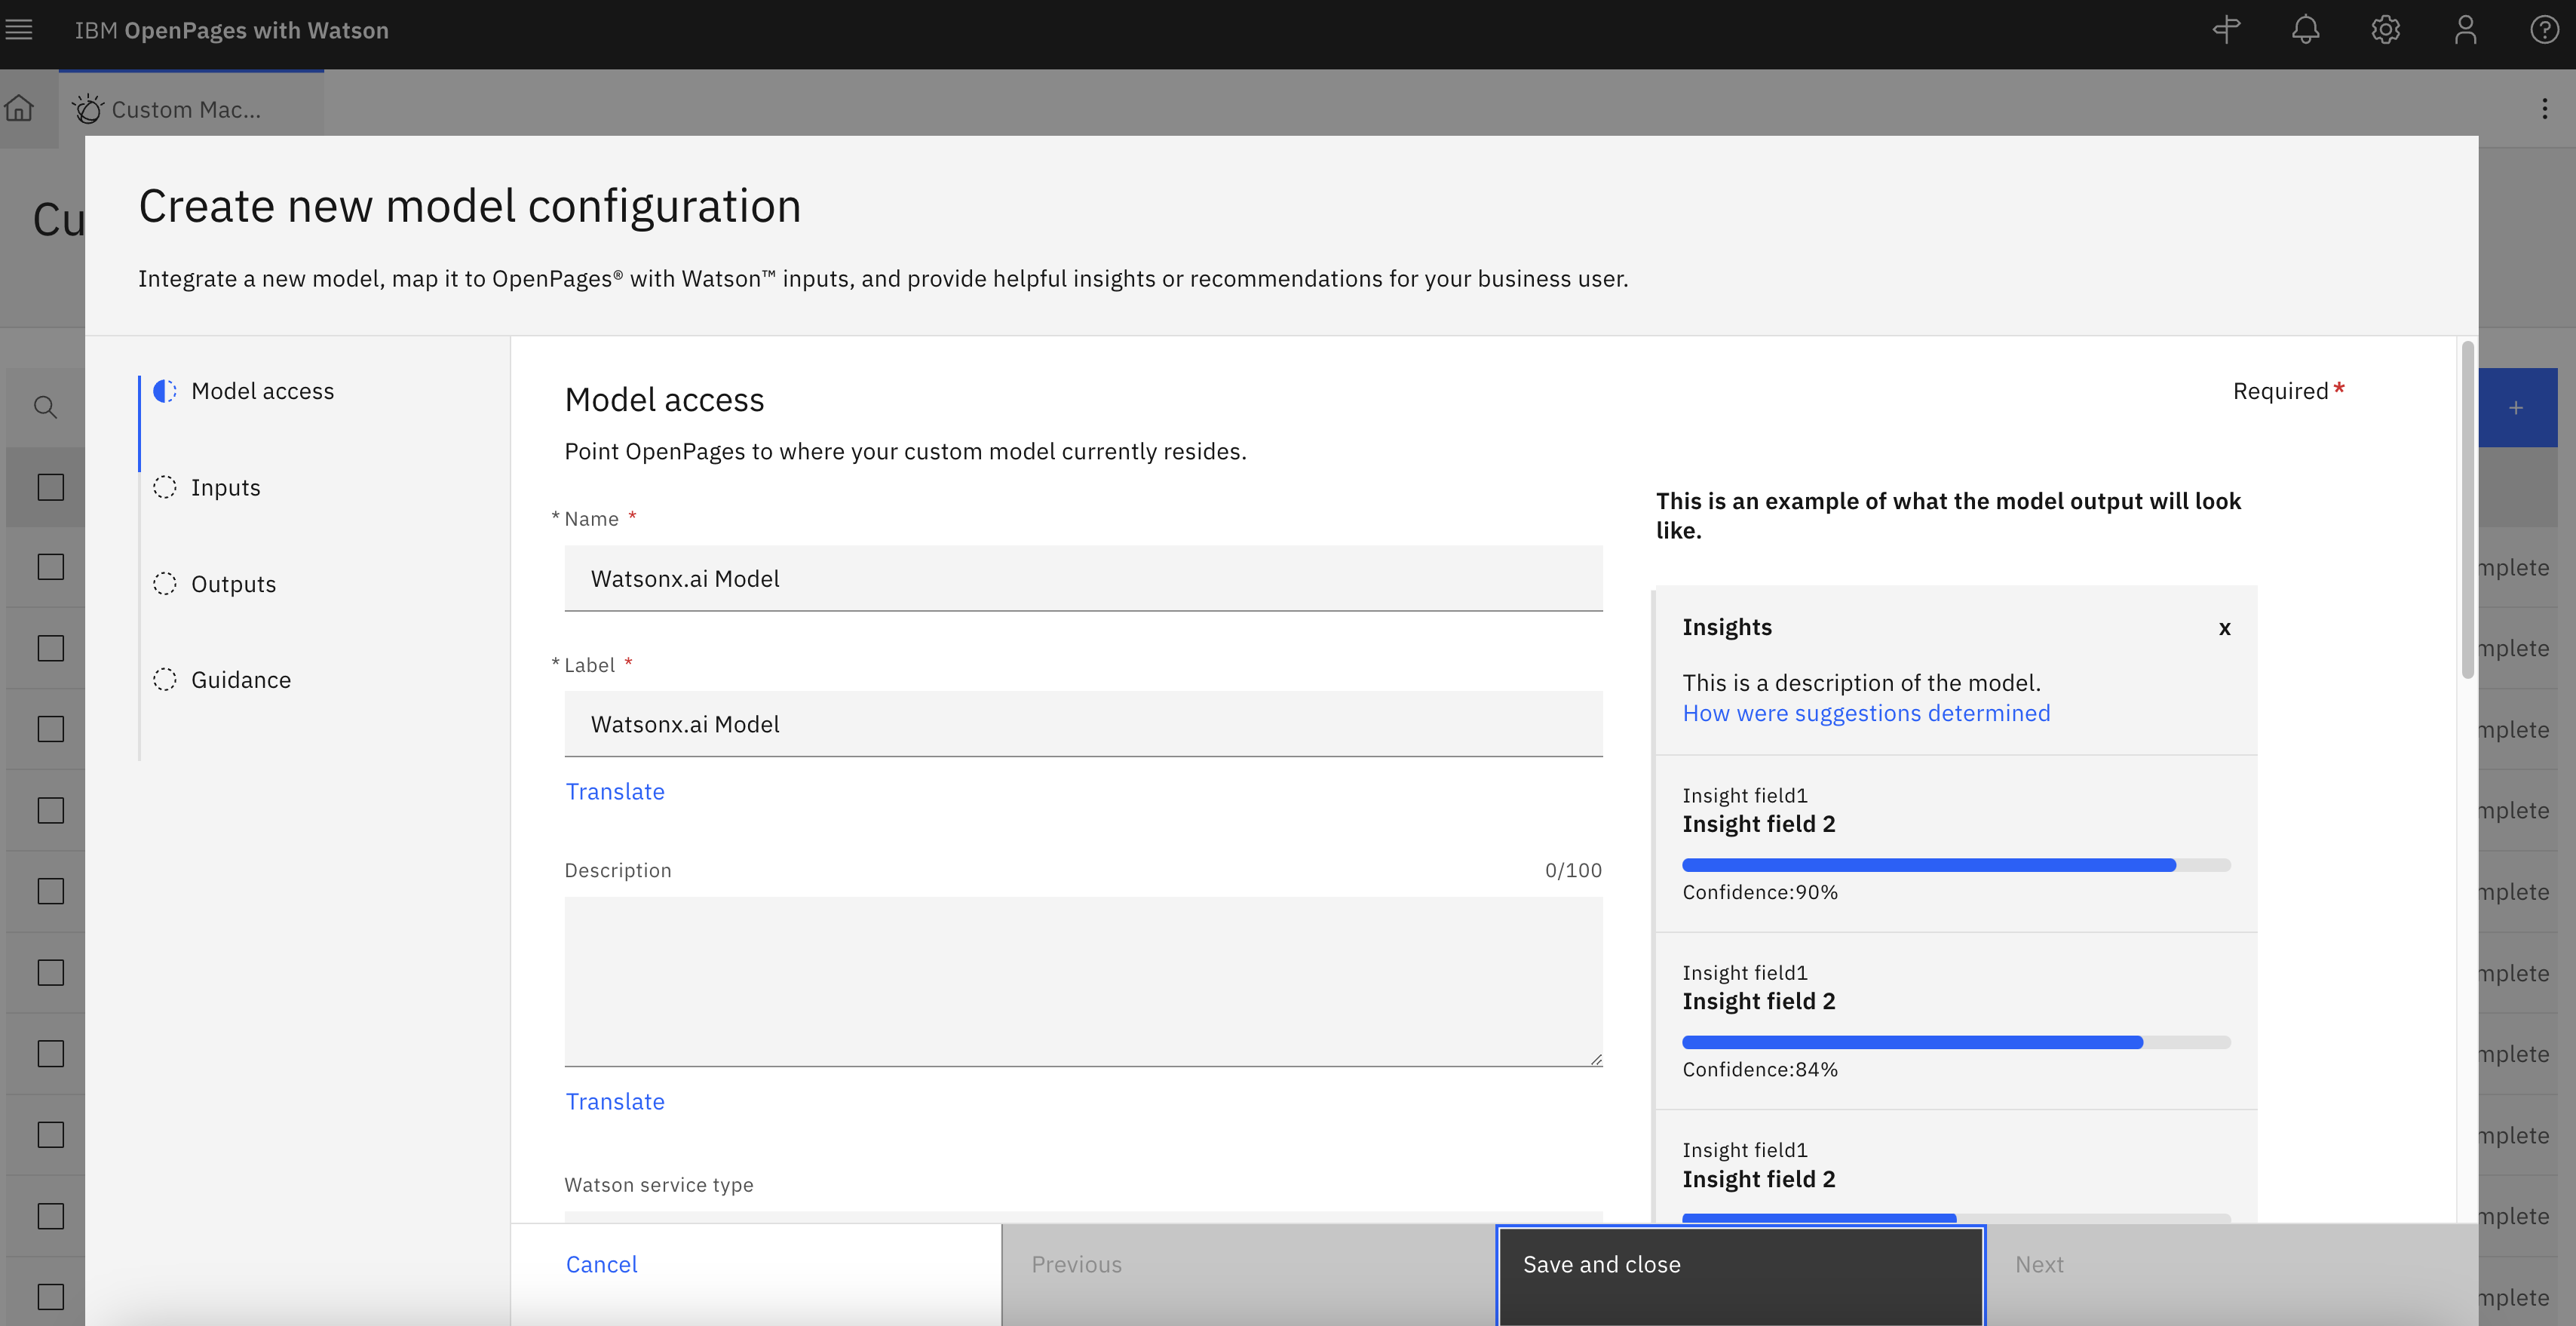
OpenPages Custom Machine Learning Models - Create New Model Configurations
Model Access
- Enter a Name and a Label e.g. “Categorization”
- Select “Watson Machine Learning on Cloud” for Watson Service Type
- Select “Display only” since we only want to display output from running the model
- For Access Parameters:
- Authentication URL: paste in the following
https://iam.cloud.ibm.com/identity/token - API Key: Create a IAM Key in the cloud account where the deployment lives
- Base Deployment URL: paste in the following
https://us-south.ml.cloud.ibm.com/ml/v4 - Deployment ID: Deployment ID found in Deployments
- Space ID: Deployment Space ID found in Deployments
- API version:
2021-05-01
- Authentication URL: paste in the following
- Click Test Connection to see if the setup was successful. Then, Click Next. Your screen should look similar to the following
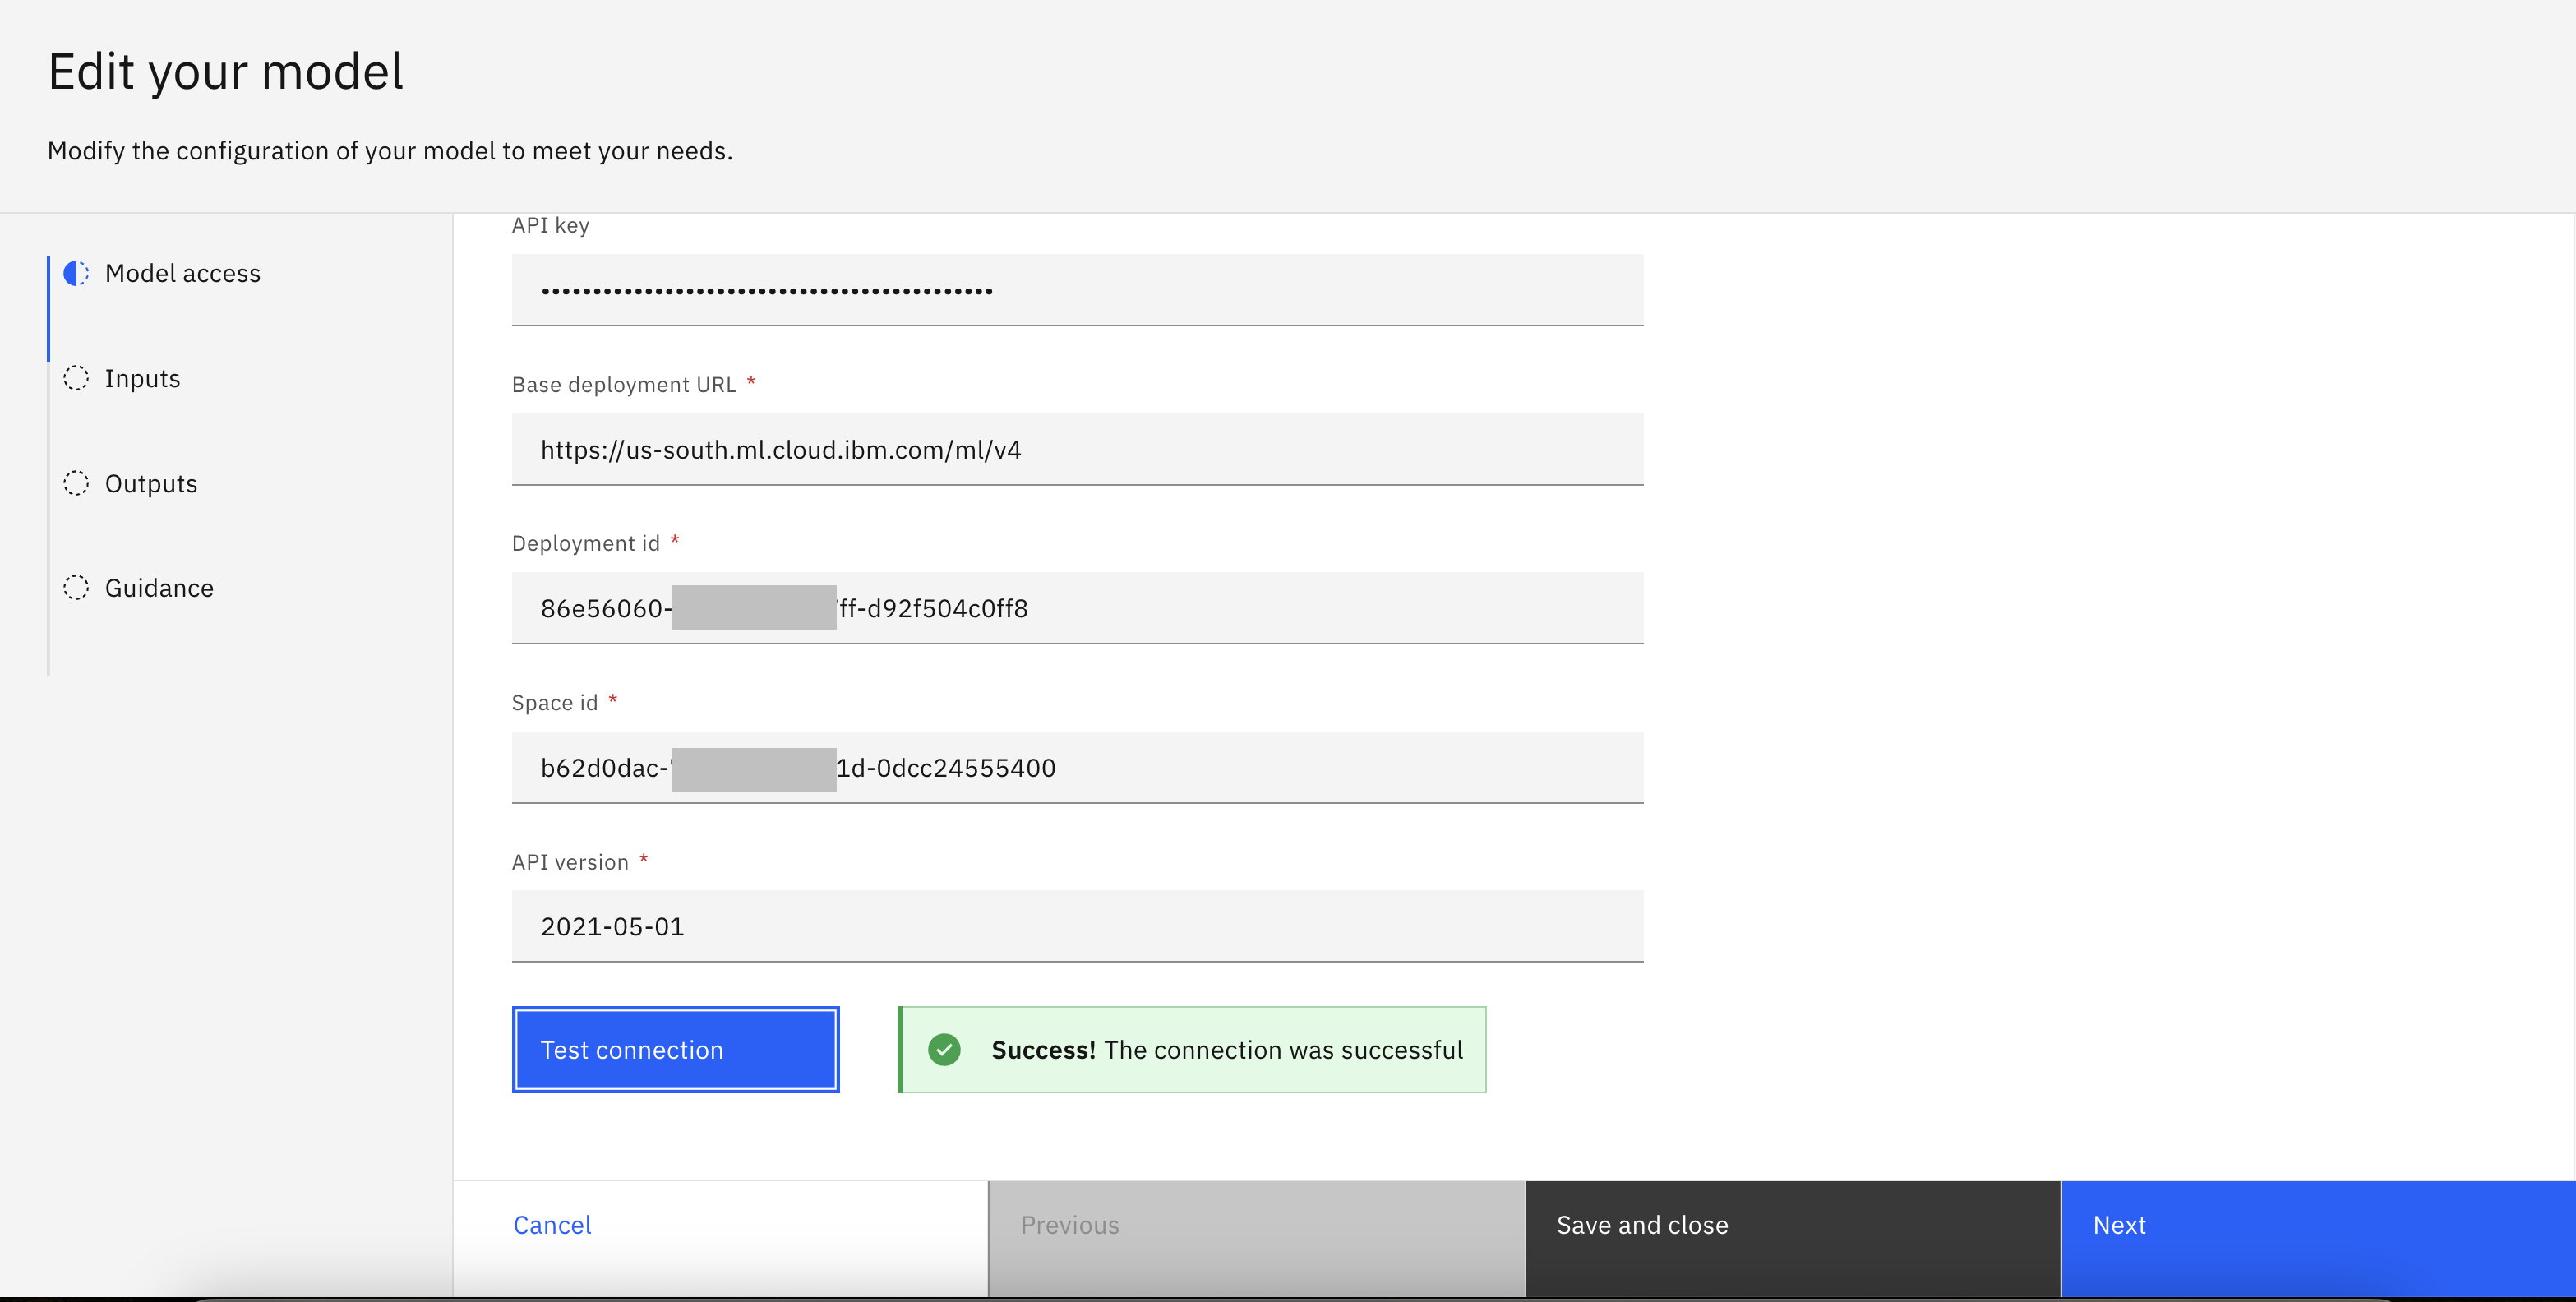
Test Connection
Inputs
- For Object Type, select the OpenPages object type that you would like this model to be applied to from the options in the dropdown list.
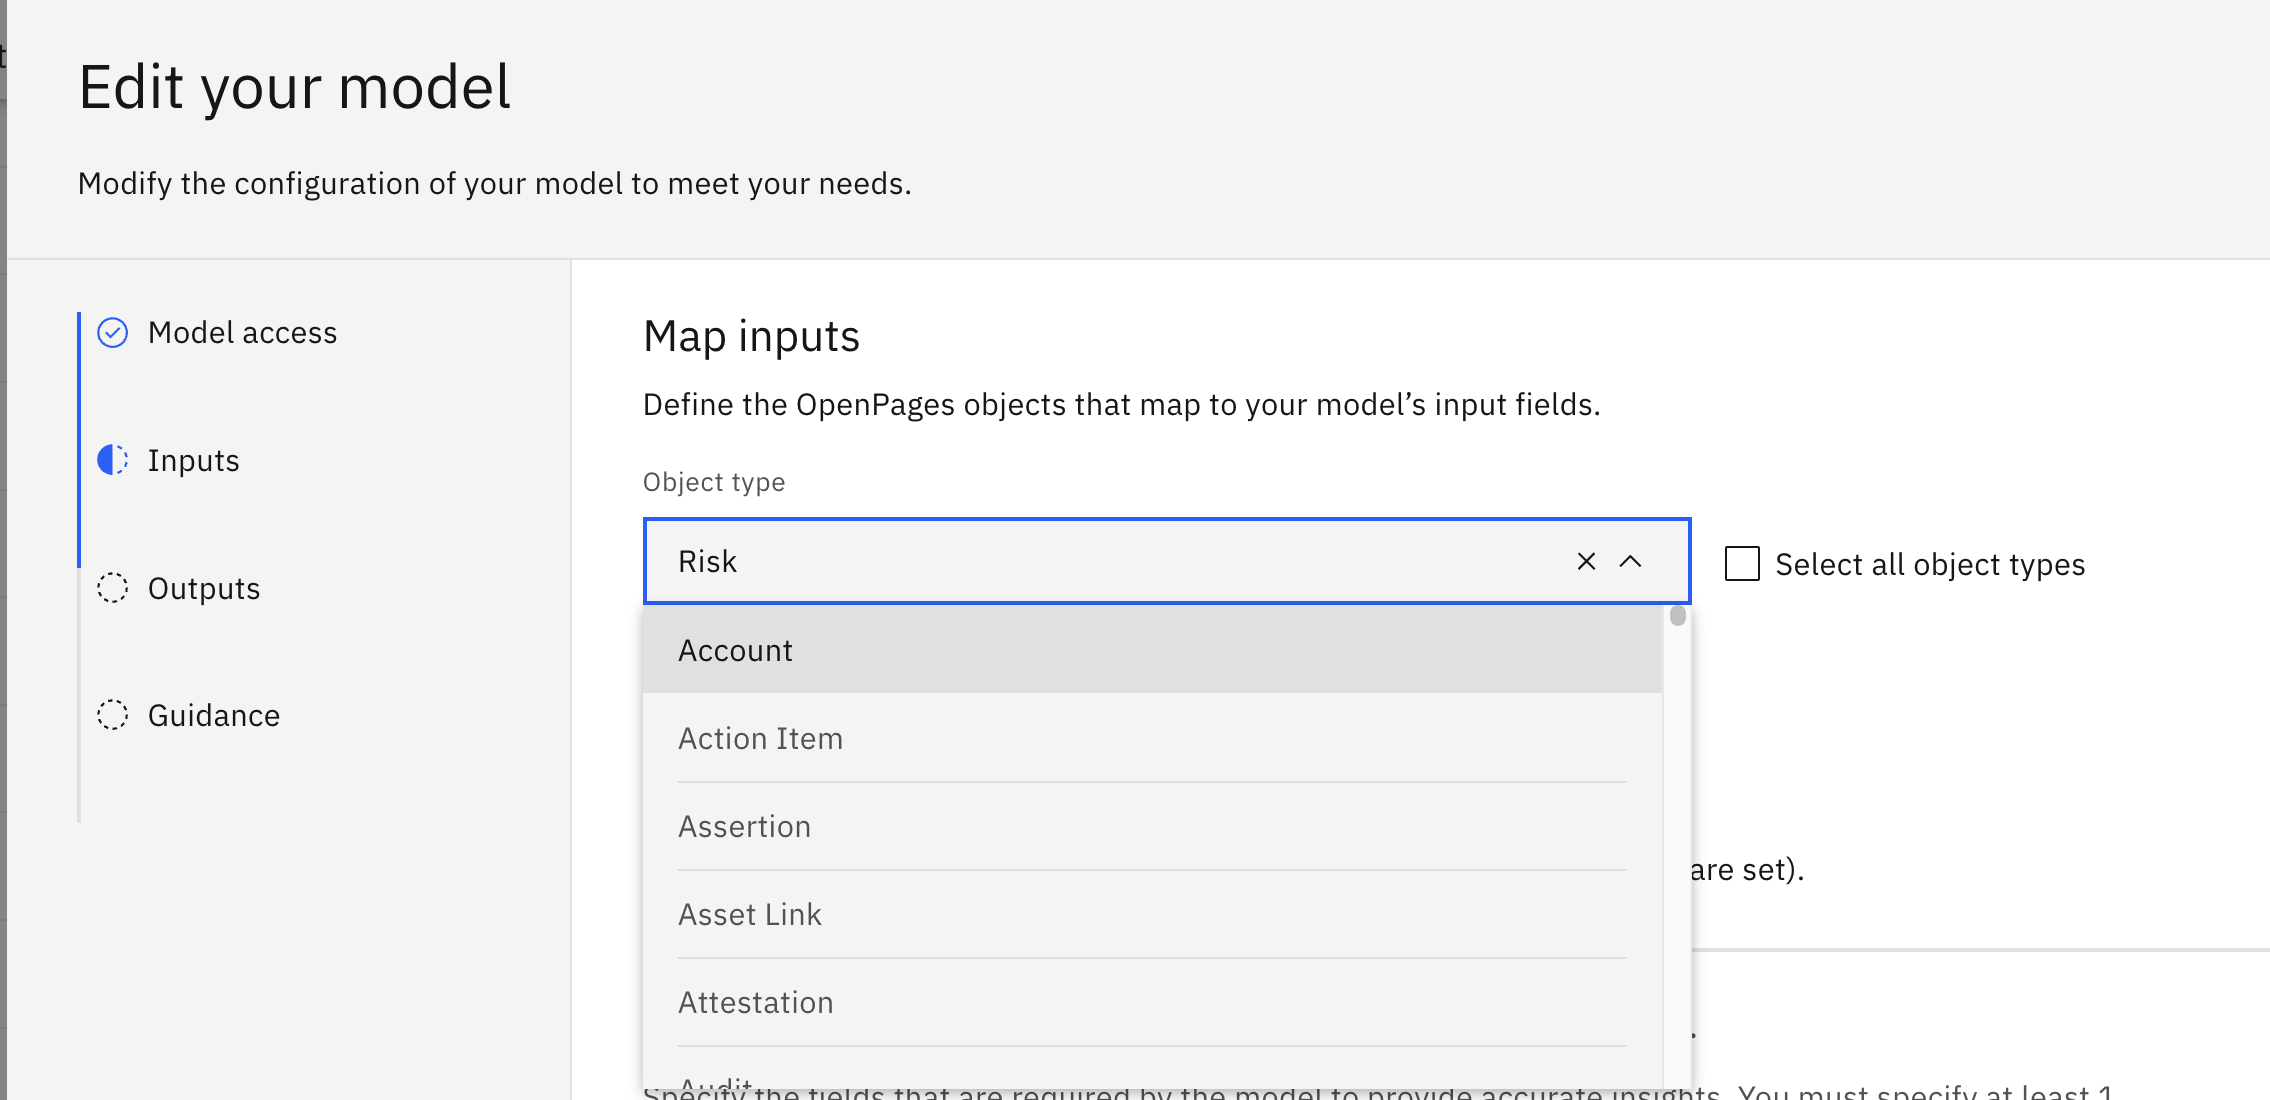
OpenPages Custom Machine Learning Models - Configure Inputs
- Select “Manual” or “Automatic” based on business requirements.
- In Add the input fields of your model and map them to fields in OpenPages, select the fields that you would like to use as the input for the model to process. In our example, we will be using Description field as the input, so we select “Description” from the OpenPages fields and type in “Description” for the Model input fields.
- Select checkbox Required for at least one field.
- The final setup should look similar to the following. Then, click Next.

OpenPages Custom Machine Learning Models - Configure Inputs Complete
Outputs
- Select “Single insight” or “List of insights” based on your use case.
- In the Output label field, input a description of what the model output is about.
- In the JSONata string field, based on your model output configuration, specify the variable to display in the output field.
- The final setup should look similar to the following, then click Next.
- For example - use the variable
predictions.values[0][0] 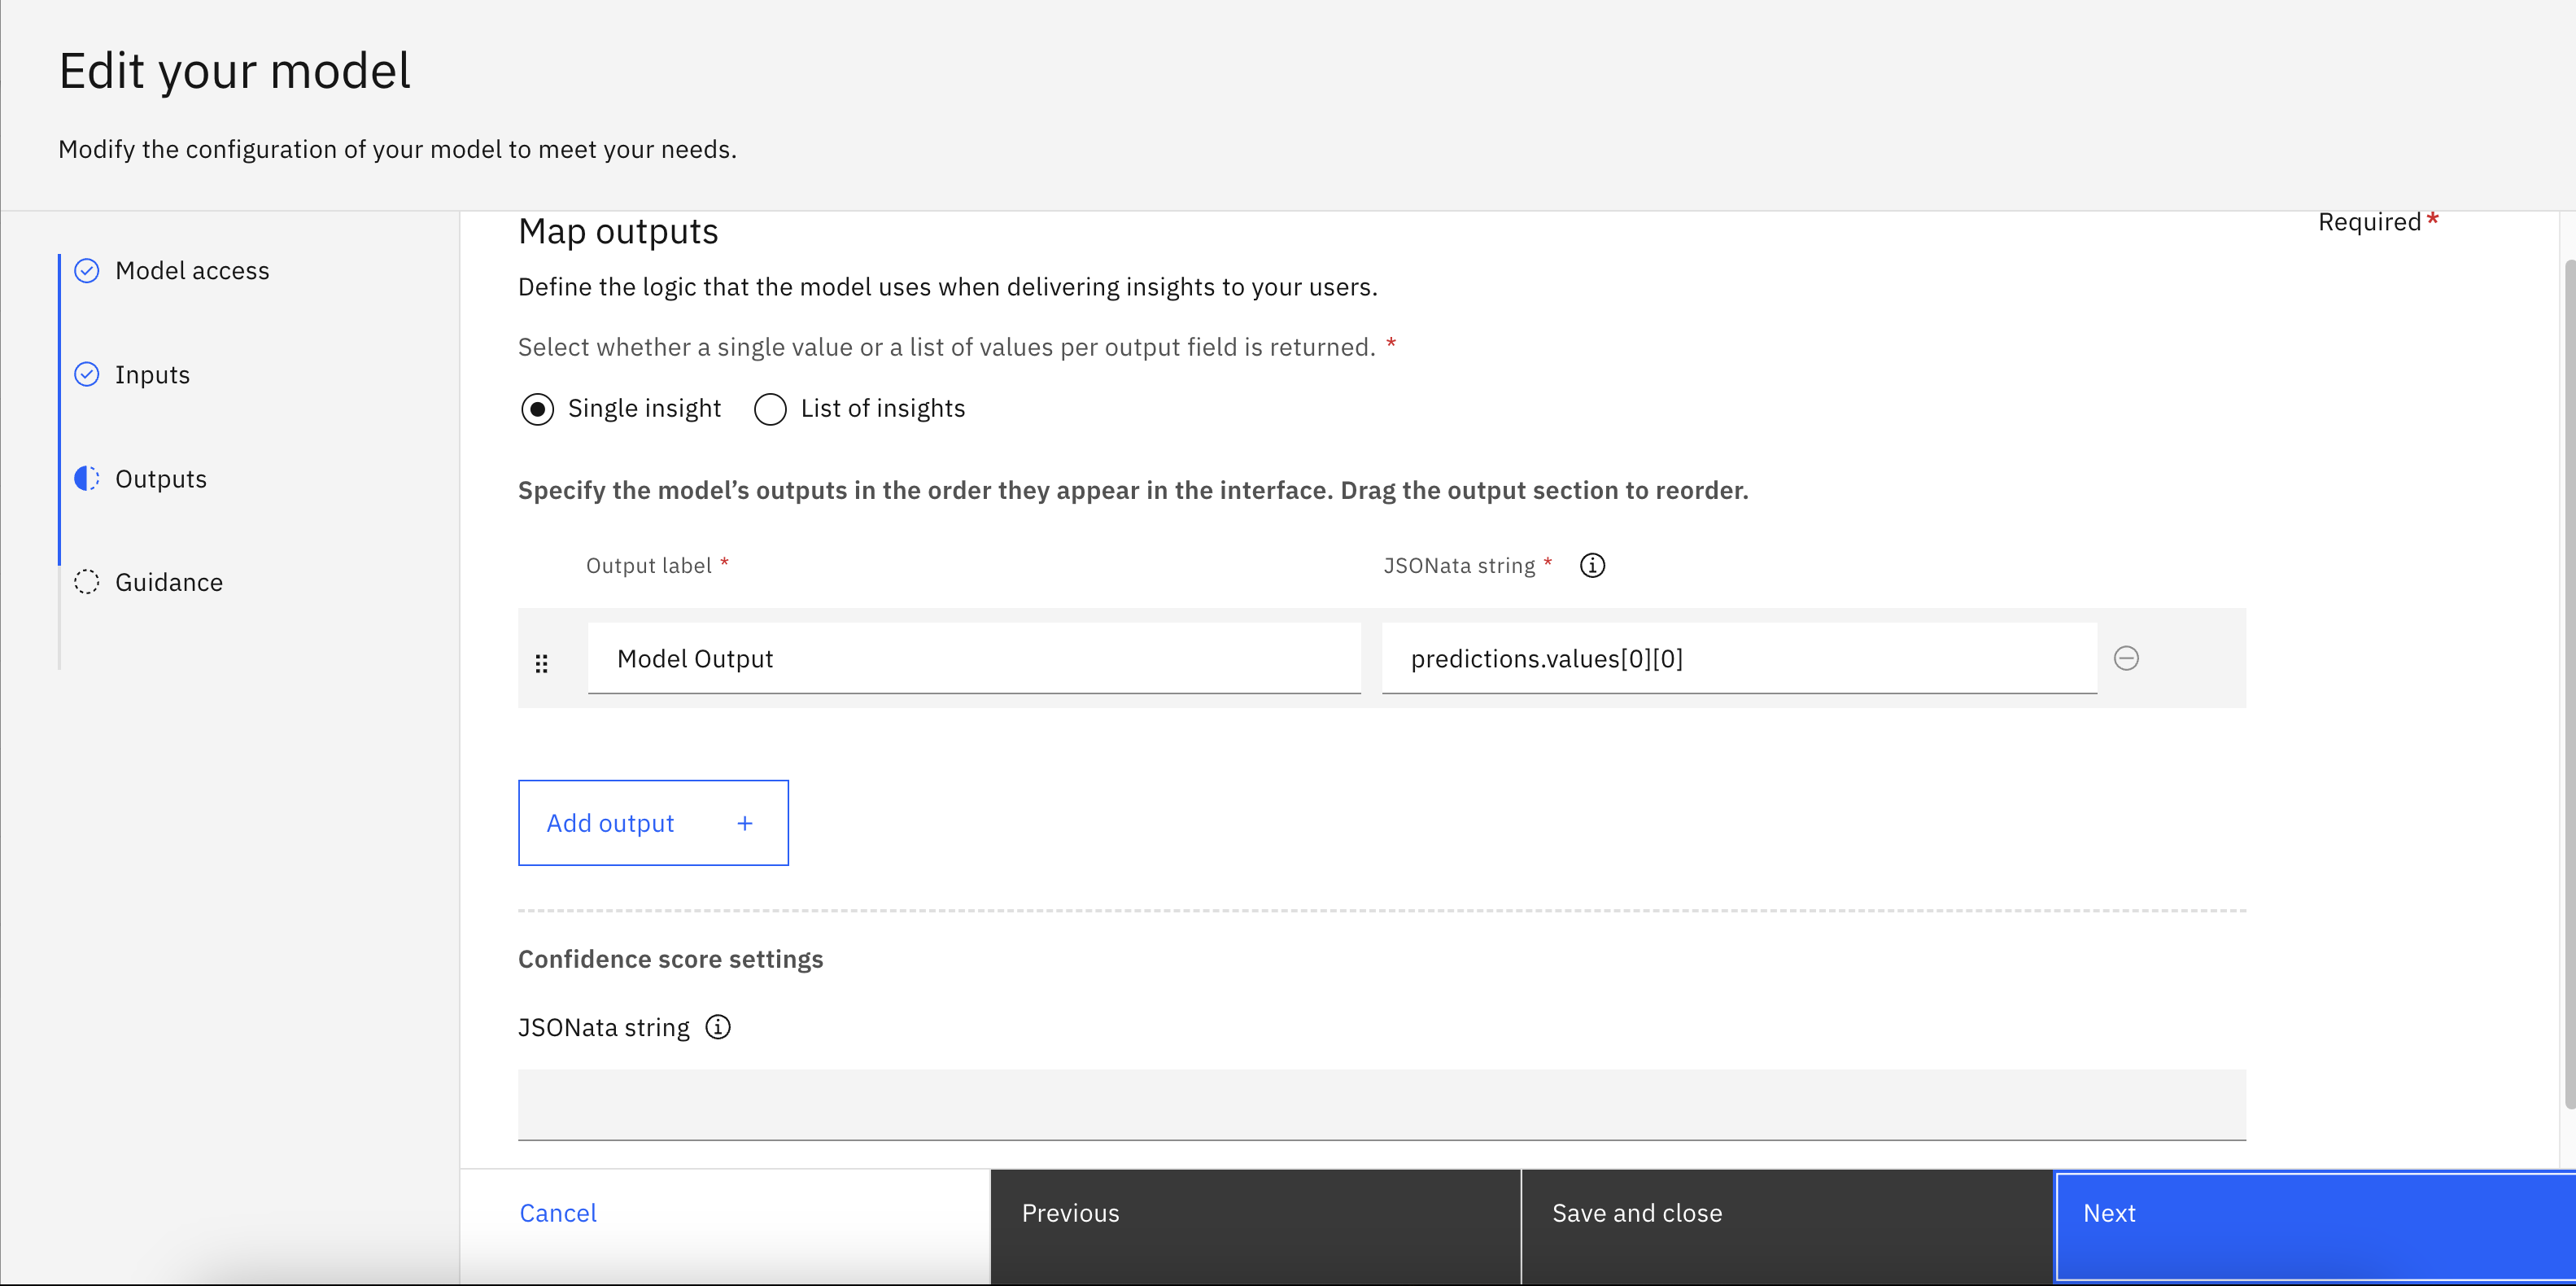
OpenPages Custom Machine Learning Models - Configure Output
- For example - use the variable
Guidance
- Input a Description for the model to help users understand what the model inputs and outputs. You could also modify the Style.
- The final setup would looks similar like screenshot below. Click “Save” to complete model setup. In the Custom Machine Learning Models table, you should see status “V Complete”.
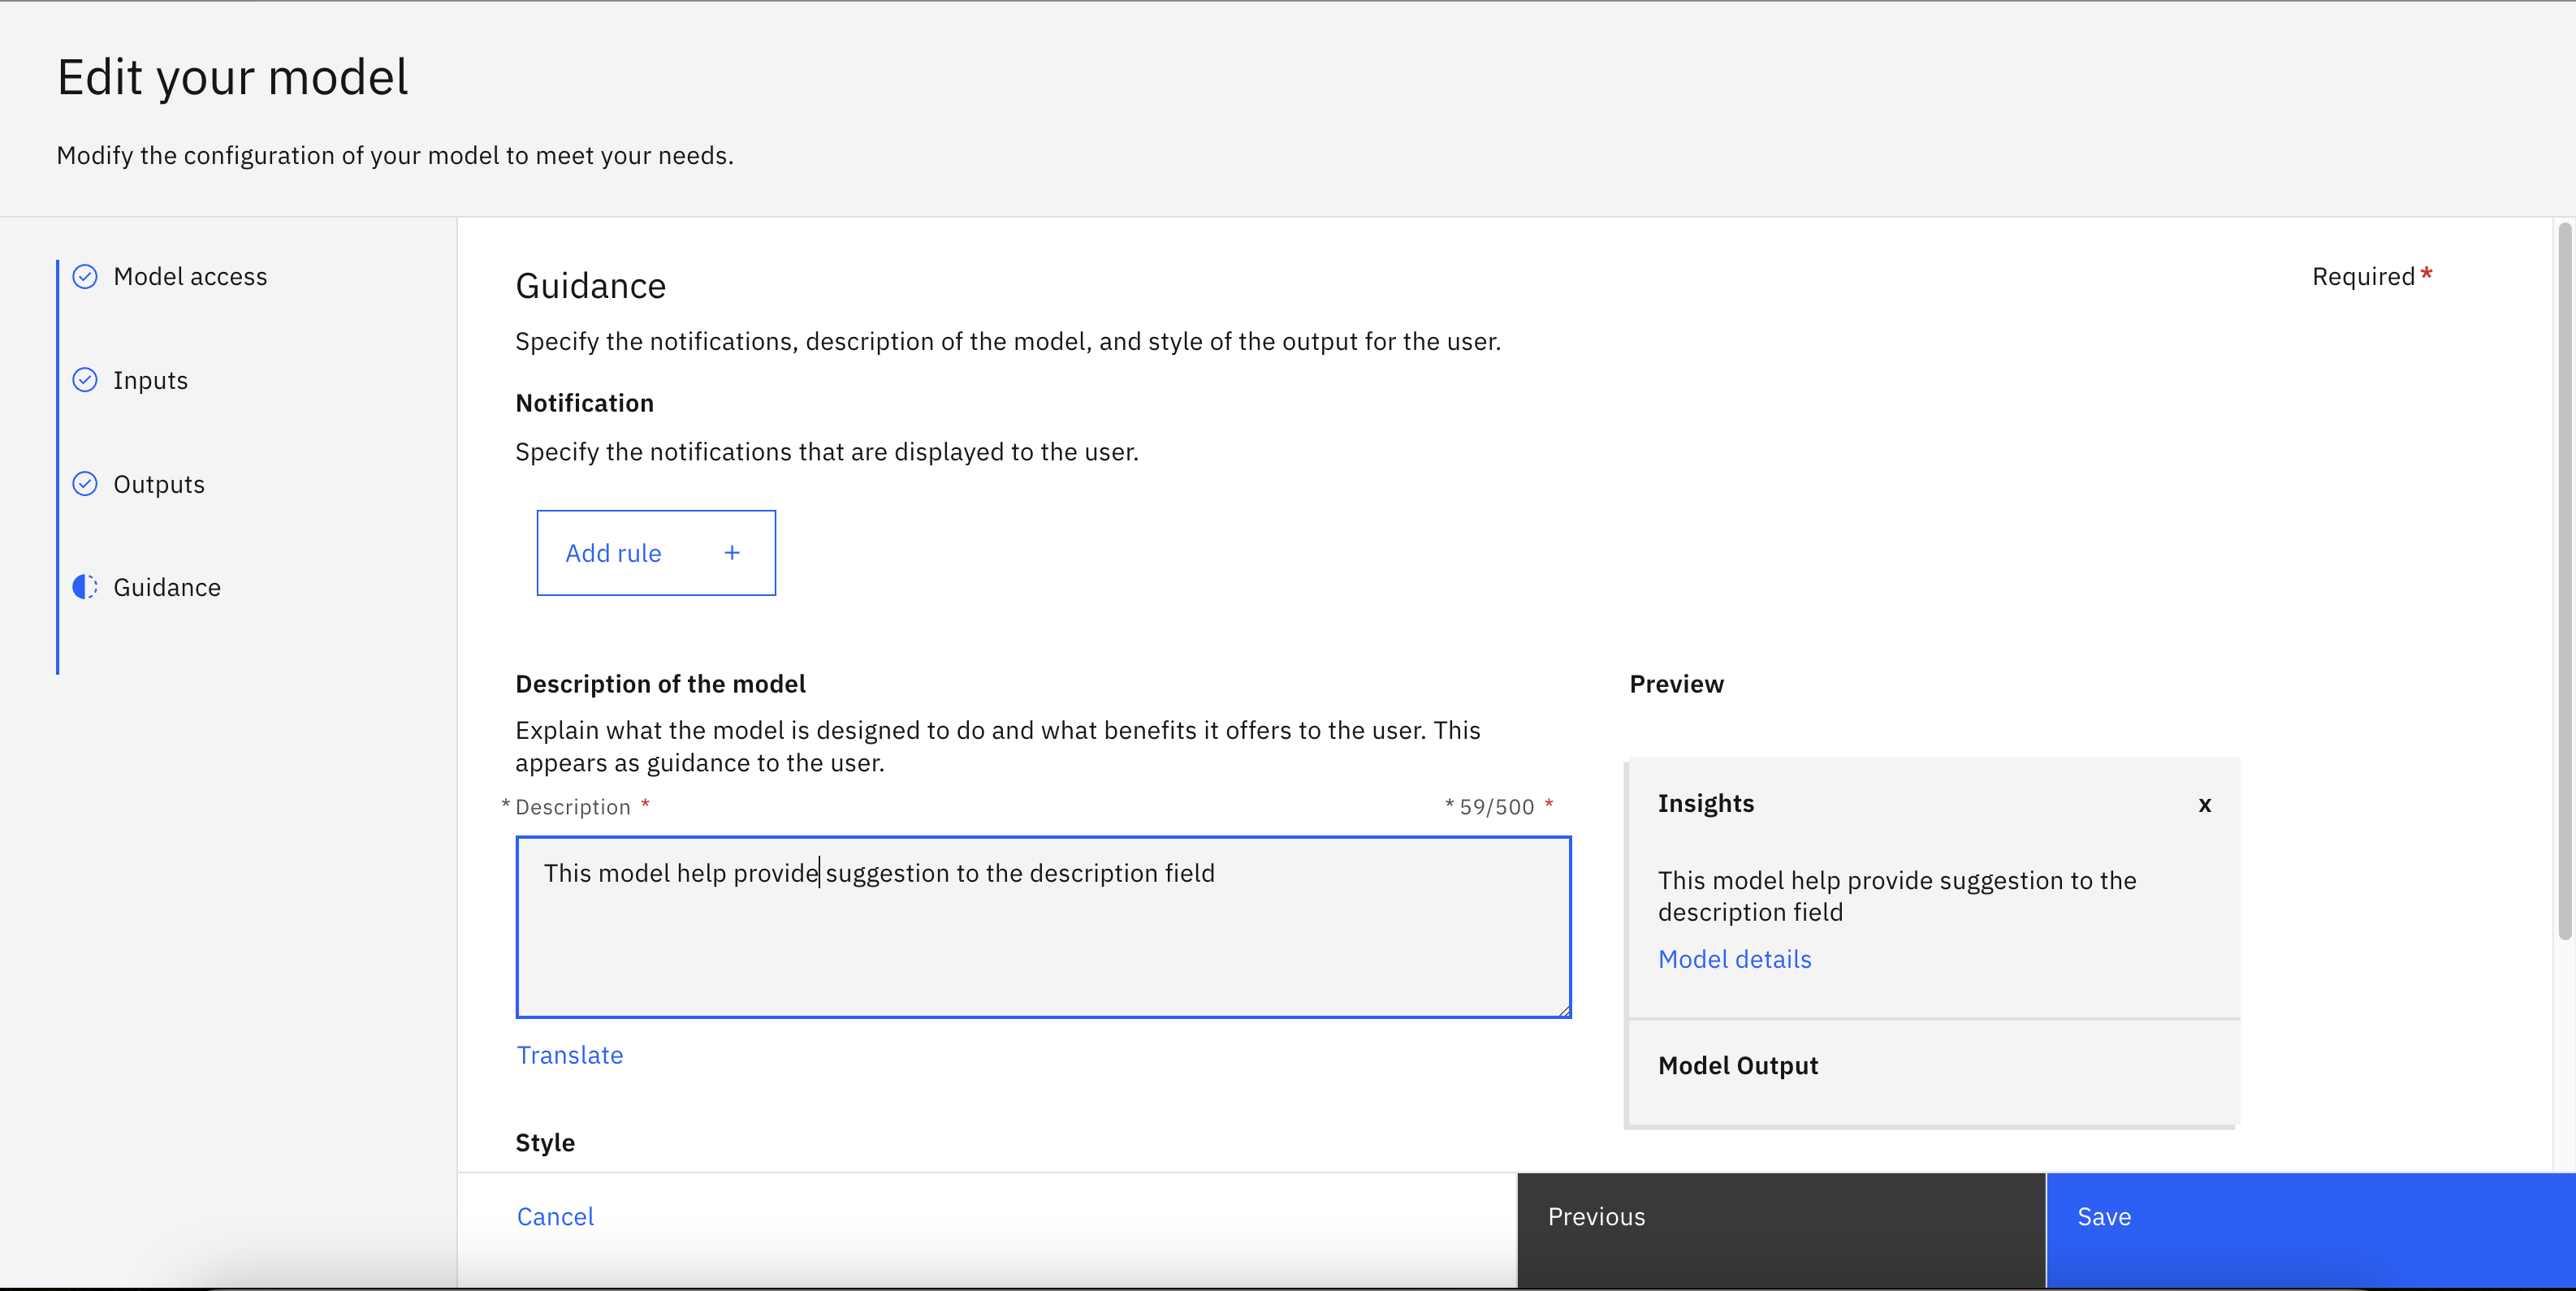
OpenPages Custom Machine Learning Models - Configure Guidance
Assign Watsonx.ai model to OpenPages View
- To assign model to views, navigate to the Administration menu, then go to Solution Configuration, and click on Views.
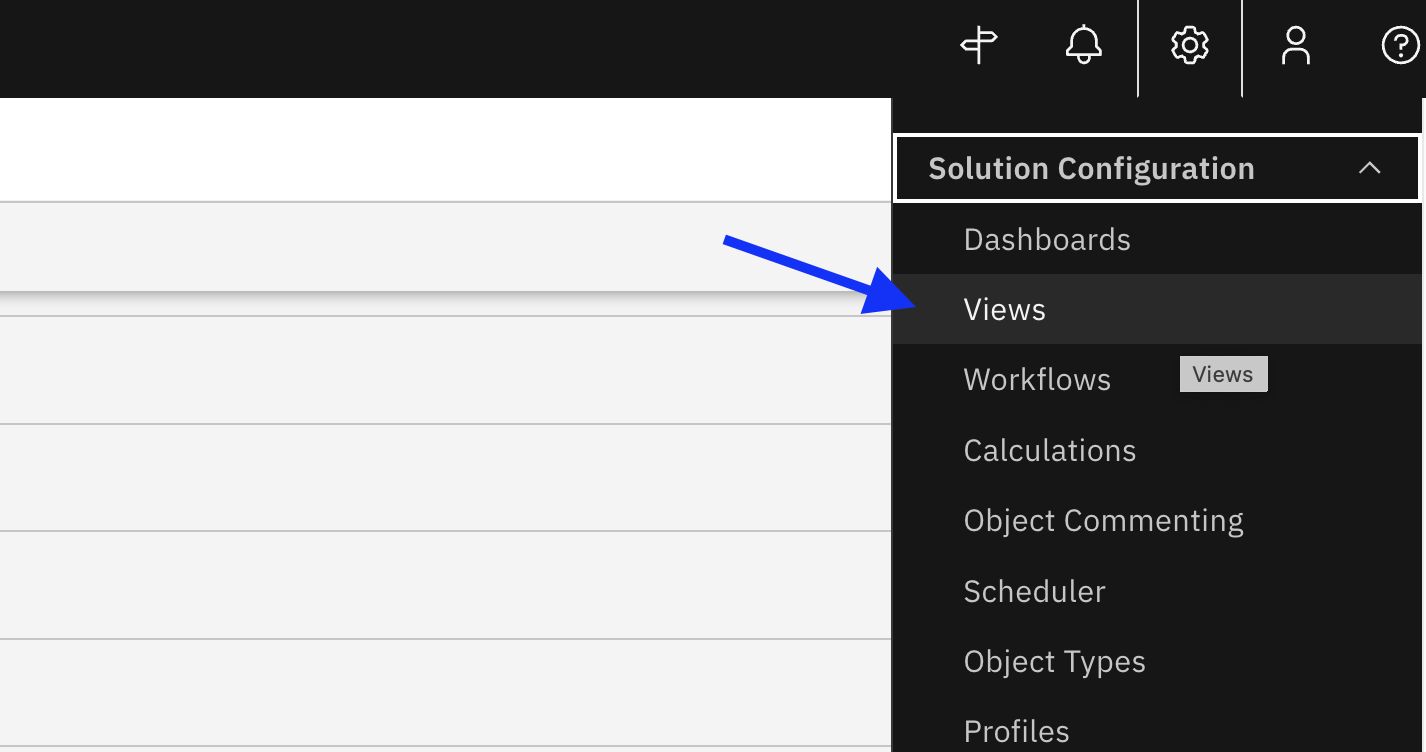
Administration menu -> Solution Configuration -> Views
- Enable Display Debug Info by navigating to the Administration menu, then the Other tab, then click on Display Debug Info. In the screenshot below, you can see blue text under “New Risk” which indicates that you are in Debug Info View. Click on the that blue text and it will link you to the exact view.
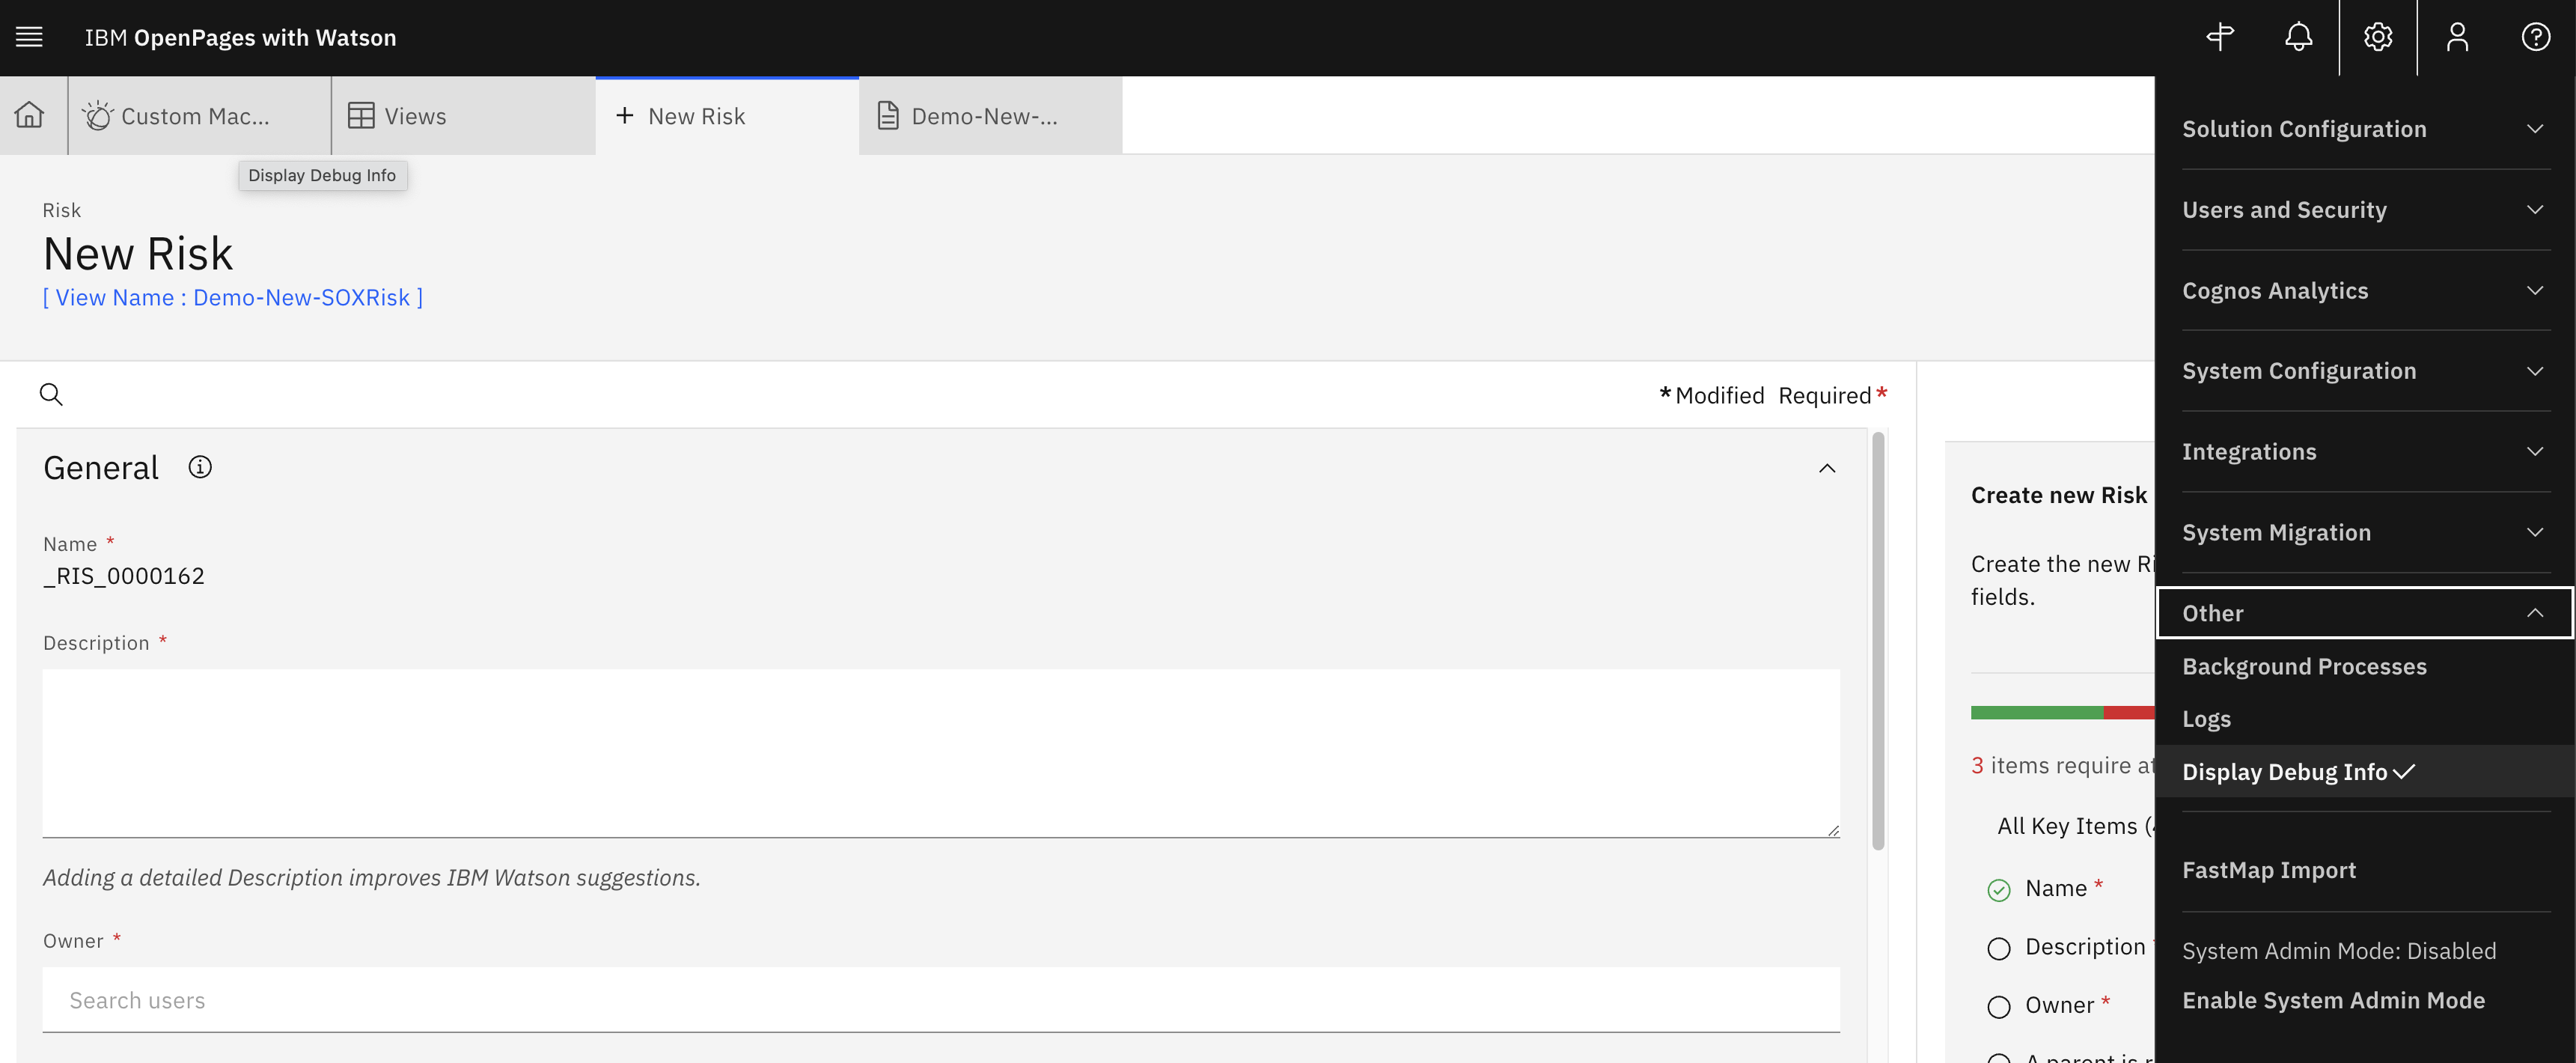
Display Debug Info
- This is an example of what a view configuration page looks like.

Example View Configuration
- Click on the blue text “Description” and a right-hand-side panel will show up. Select the specific model that you would like to apply to this field. Click Done, then click Publish.
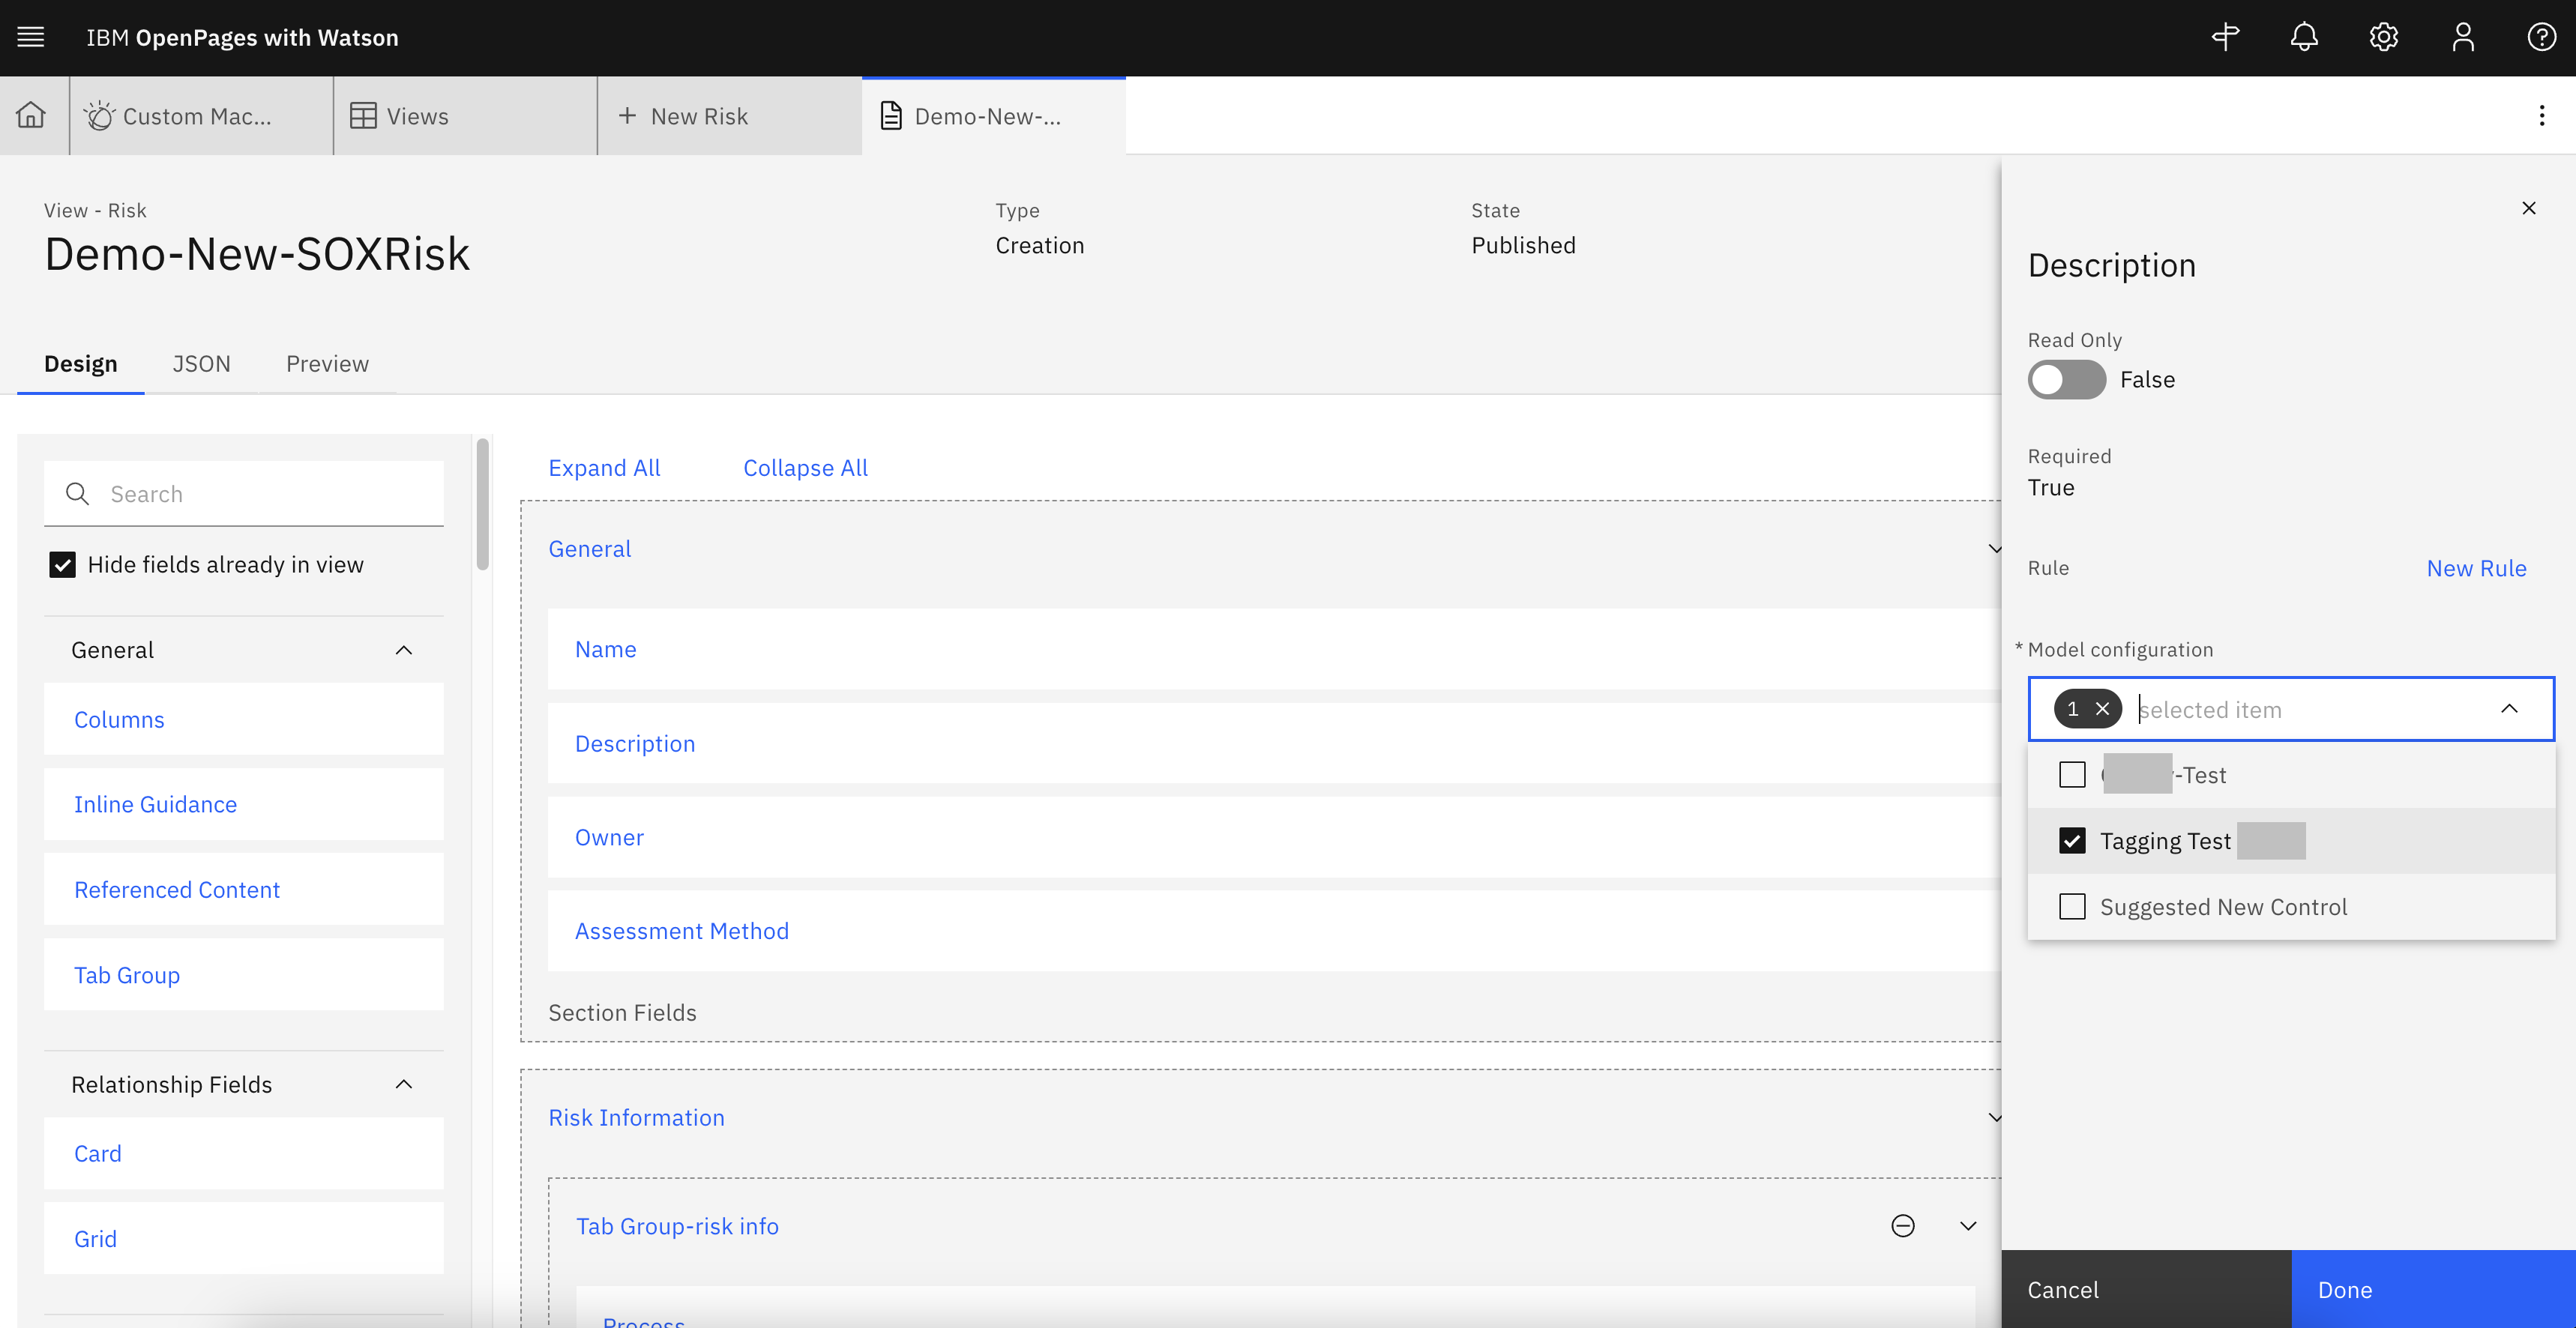
Assign Custom WML to fields
Final Check
- Navigate back to the view where the watsonx.ai model was applied. Input text to the Description field and a lightbulb should show up.
- Click on the lightbulb to open the right-hand side panel where the model output will show up.
- You could continue update the model prompt to further improve the model performance based on your business requirements